1. Insert the disc containing the patient's data into your computer. If you have used this programme before, copy the file named "Documents" from the disc to a folder of your choice on your computer.
2. Wait for the disc autoplay window to appear on screen. Click on it, or open "My Computer", navigate to the CD drive, and double-click with the left mouse button.
3. When the purple window opens, click once on the patient's name and surname, then click the "Open" button.
4. When a window opens showing the patient’s details at the top, click the “New multiplaner” button on the left:
You will see the first page of images. You may begin your analysis:
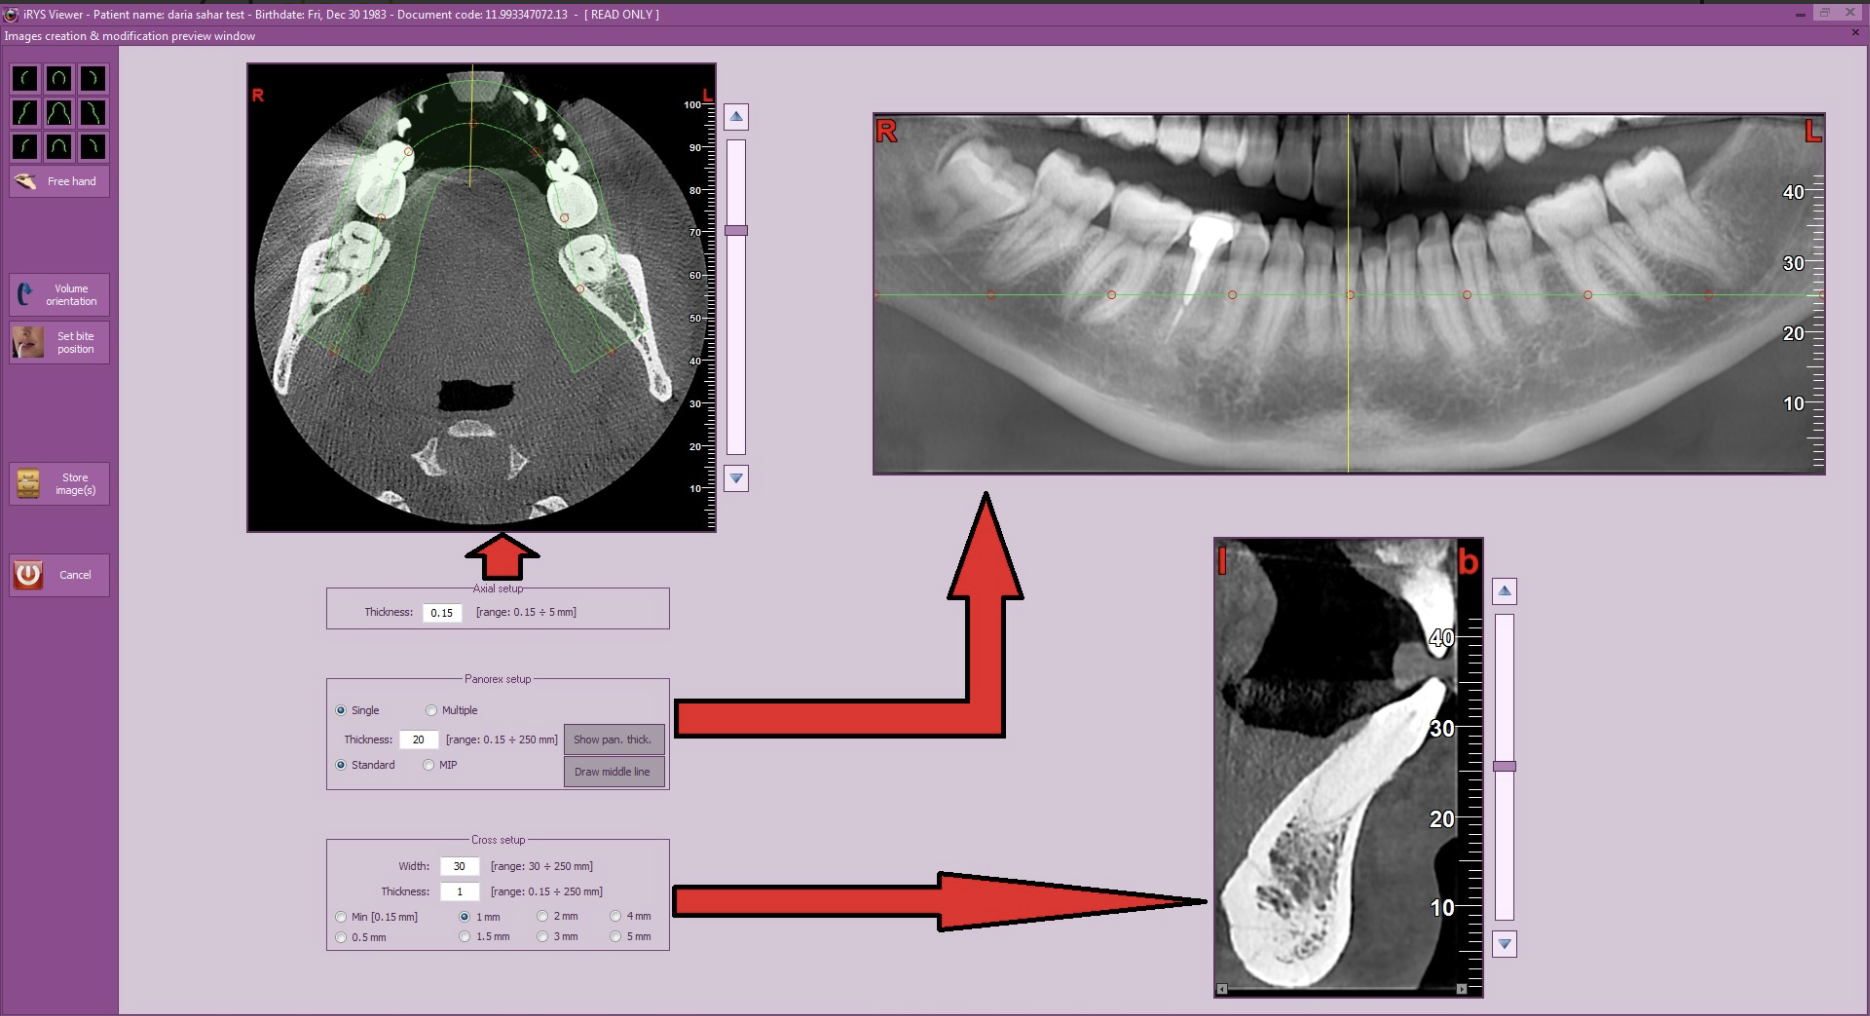
5. By scrolling the mouse up or down over the axial slice images in the upper left area, you can select the height level ("Axial setup"). Moving the points within the frame on the selected axial slice image will generate a panoramic view. You can then adjust the panoramic image thickness by changing the values in the "Panorex setup" field. For example, to clearly visualise the mandibular canal, select a thickness of 1. Selecting a thickness of 20 will display a standard panoramic image.
In the "Cross setup" field, you can select the thickness of the coronal slices and the distance between them. For example, selecting a thickness or spacing of 1, 2, or 3 millimetres will produce more or fewer slice images for analysis.
6. To save your settings, click the "Store image" button on the left side of the window. You can always return and adjust the settings by clicking the "Modify" button.
7. You will now see the main analysis view.
This window contains 4 main elements: axial slice images (upper left), panoramic image (upper right), coronal slice images (lower right), and the 3D view (lower left).
In the panoramic image you will see yellow vertical lines indicating the position of each coronal slice. Each line is numbered to correspond with its coronal slice image. Using the mouse, you can reposition the lines and select the slice images you wish to analyse. Note that the red line will indicate the coronal slice image highlighted with a red border.
8. In the toolbar on the right-hand side, you will find numerous options for image analysis. For example:
a) Selecting the "distance toolbar" function allows you to measure coronal slice images both vertically and horizontally. You can also delete individual measurements or all measurements at once using the options on the right side of the window.
Press the right mouse button once to exit the function.
b) To mark the mandibular nerve canal, click the "show markers toolbar" button. These markers can also be deleted.
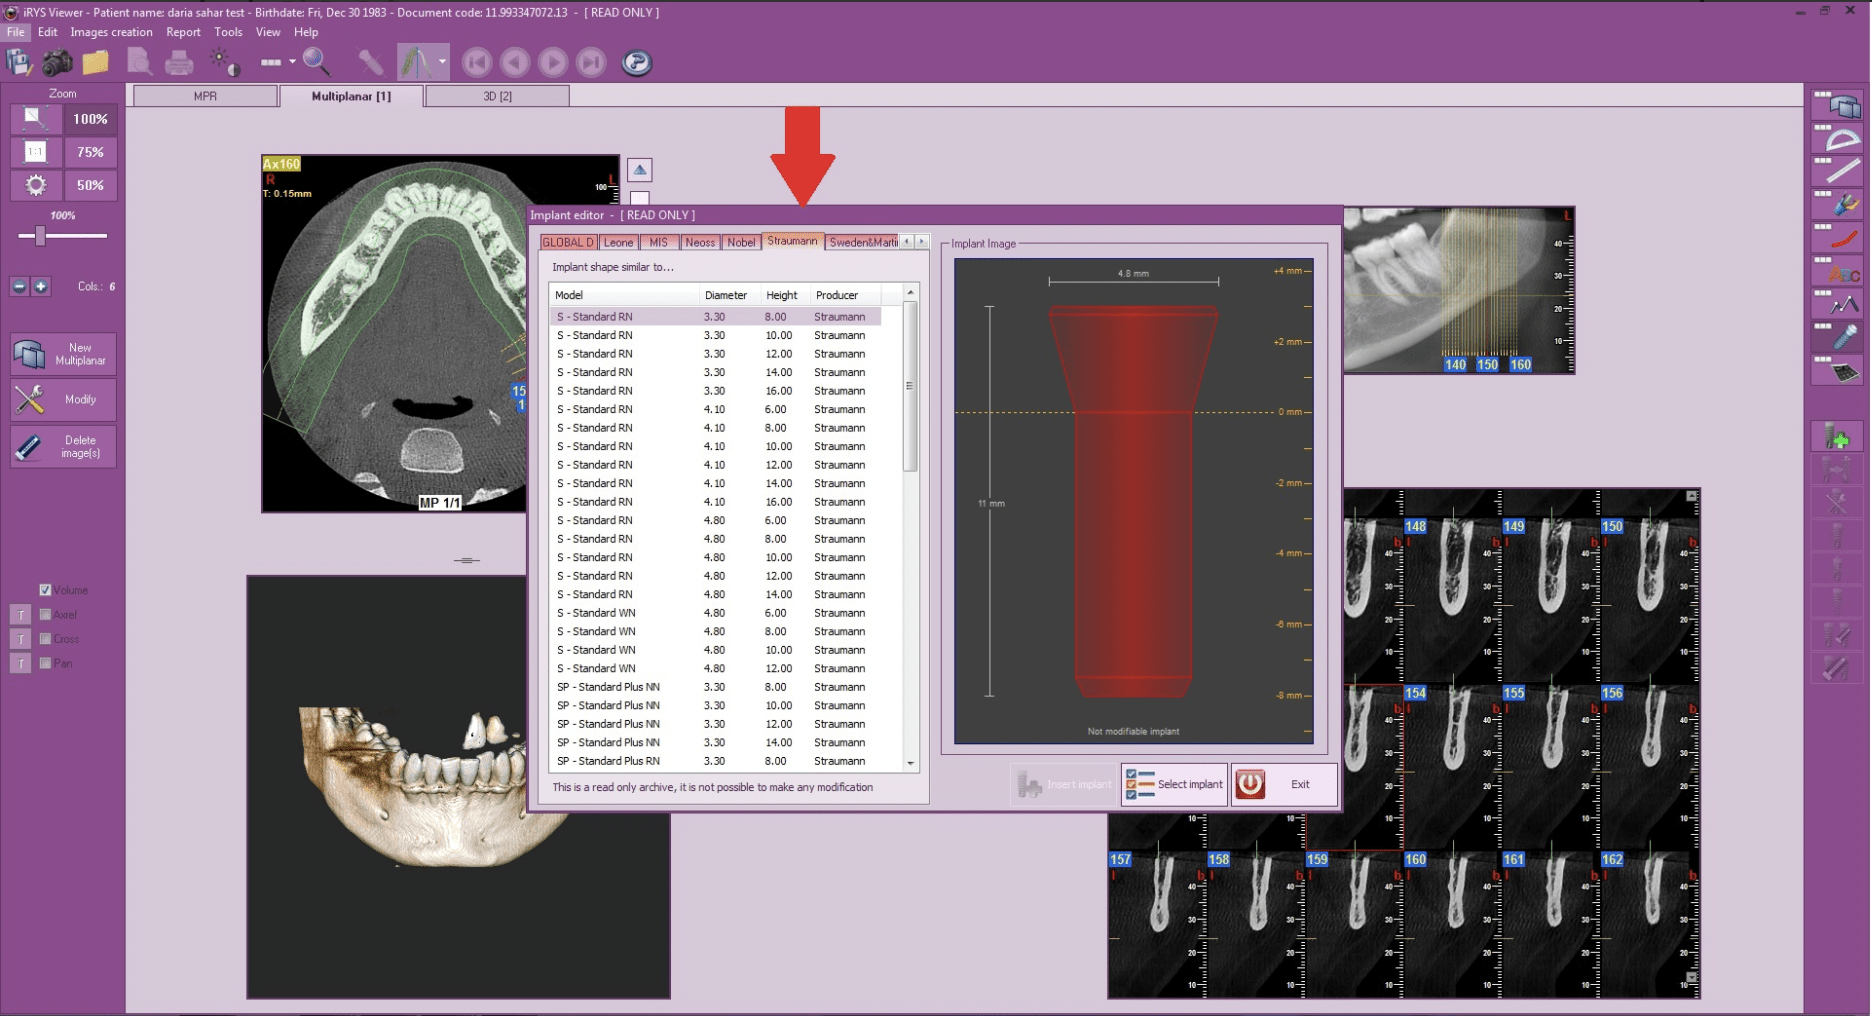
c) Clicking "show implants toolbar" allows you to preview how a specific implant will appear at the desired implantation site.
Press the green plus icon "new implant" and, when the "implant editor" window opens, select the desired implant size and manufacturer.
Position the selected implant on the coronal section or panoramic image. Once you have adjusted the implant position, click the left mouse button:
9. Select the 3D view section and click the "new 3D" button. Here you can adjust the view position and apply filters such as the cephalometric view, virtual gingiva, and more. To save the view, click the "store image" button in the upper right.
10. Double-clicking on any image allows you to adjust its brightness and contrast.